
6 Photography Tips To Showcase Your Vacation Rental
You might be offering a magnificent vacation rental, but it’s not going to attract renters without quality real estate photography. In fact, you can easily fetch a much higher price if your place looks good online. To help you realize this goal, we’ve put together a quick guide of 6 real estate photography tips for vacation rentals.
In This Article:
- Adjust Your Camera
- Let There Be Light
- Find the Best Angle
- Neaten Up
- Create a Focal Point
- Take Lots of Photos
How to Take Eye-Catching Vacation Rental Real Estate Photography
Adjust Your Camerareal estate photography
Before doing anything, make sure your camera’s settings are optimal for real estate photography.
Even phone cameras have a lot of customizable settings these days, so take a few minutes to explore what’s available and change the following settings if possible:
- Light source setting. Choosing the appropriate light source and time of day will modify the color palette and make the blacks and whites look crisper.
- Compression settings. Most digital cameras compress new photos by default. Make sure compression is disabled to make your rental look its best in the images.
- Grid view. We’d recommend turning on the grid view that comes on most cameras for a few reasons. First of all, it helps you compose the photo and practice the important photography rule known as thirds rule. Second, it enables you to make sure your photos are straight. It can sometimes be hard to tell if you are holding the camera vertically when you take the picture because the camera screen is so small. But you can really tell when the photo is blown up to the size of a computer screen.
Even though a high-end phone camera will do, it’s even better to use a DSLR camera. You can purchase a nice one for $500, and it will enable you to take more pitch-perfect pictures with gorgeous depth-of-field.
Let There Be Lightreal estate photography
More light is never a bad thing in real estate photography. Certain kinds of light are better than others, but any type of light is suitable. You don’t want your photos to be washed out, and you don’t wish to glare on the lens, but as long as you avoid that, you should do everything you can to make your photos glow.
Natural lighting is the best, and like with other types of light, the more of it, the better. That means the best time to take photos is at the brightest time of day, usually at noon. The hour before the sun goes down can also provide lovely images, but that kind of light is better for beautifying photos than actually showcasing the property. If you’re taking interior photos, open the shades or curtains to let in as much natural light as possible!
Whether natural light is present or not, you should also use interior lighting for your shots. Use lightbulbs that are between white and yellow light — 800 lumens is ideal. Make sure all lightbulbs throughout the home are the same type.
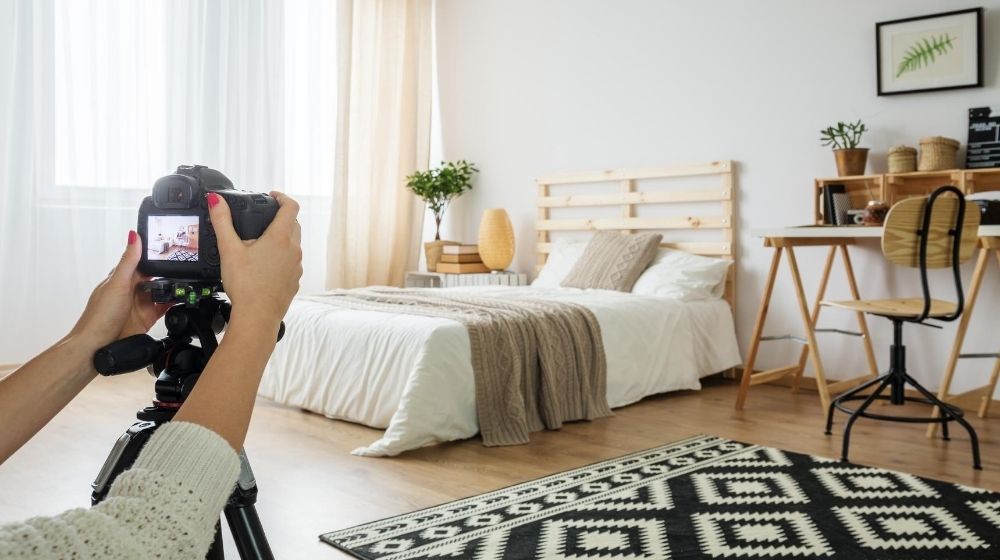
Find the Best Angle

Each photo should be taken about 5 feet off the ground, to mimic the eye-view of a person. In the same vein, the photos should be taken straight-on.
To give the viewer as good an idea of the space as possible, take the photos from the corner of the room. A fisheye lens will make the room look bigger, but it might be disappointing when someone realizes the property is smaller than it looked online.
For wide shots, getting a bit lower and angling the camera just ever so slightly upwards will make the space look more open.
Buying a tripod will help you adjust your shots’ height and angle while avoiding blur or tilting. They’re available for every kind of camera (even phones).
Neaten Up

Clean up the property before taking photos!
- Make sure the apartment is ready to live in before photos are taken. Photographing a space that is different than what the potential renters look at is a turn-off.
- Make sure the surfaces you are shooting are spotless. Stains and smudges ruin the comfortable, modern aesthetic you want to capture.
- Hide any clusters of charging cords.
- Put everything in its place. If you’re photographing the kitchen, the only items on the counter should be the appliances that come with the rental. Dishes in the drying rack are useful because they make the property look lived-in and cozy.
- Make sure the pictures on the walls are not crooked.
Create a Focal Point
Each of your photos should have one focus, one point that attracts the eye.
Sometimes, that means showcasing one of the property’s more distinctive features in a shot. The ultra-high-end fridge in the kitchen, for example, or the massive shower in the bathroom, or the fancy lawn ornaments in the garden.
In wide shots meant purely to showcase a room, the photo might not have a natural focal point. In these cases, create one by placing a colorful item like a fruit bowl or vase of brightly-colored flowers in the shot.
In either of these cases, just go with one focal point. Including more than one in a shot will make the composition confusing to the viewer.
Take Lots of Photos
The more photos on your listing, the better. With so much competition in the Arizona vacation rental market, buyers always ignore listings without pictures and almost always ignore those with just a few photos. So try to include a few photos from different angles of every single room in the property and the exterior.
Great photos are arguably the most essential part of your listing since they are the most attention-grabbing part of it if they are done right. Take these 6 tips into consideration to get a huge jump on the competition!
2020 has given real estate photography connoisseurs an exciting new option; drone shots! Check out this video guide to find out more about them!


Leave a Reply
Want to join the discussion?Feel free to contribute!